menu

A predator-prey model

←Previous tutorial | Next tutorial →

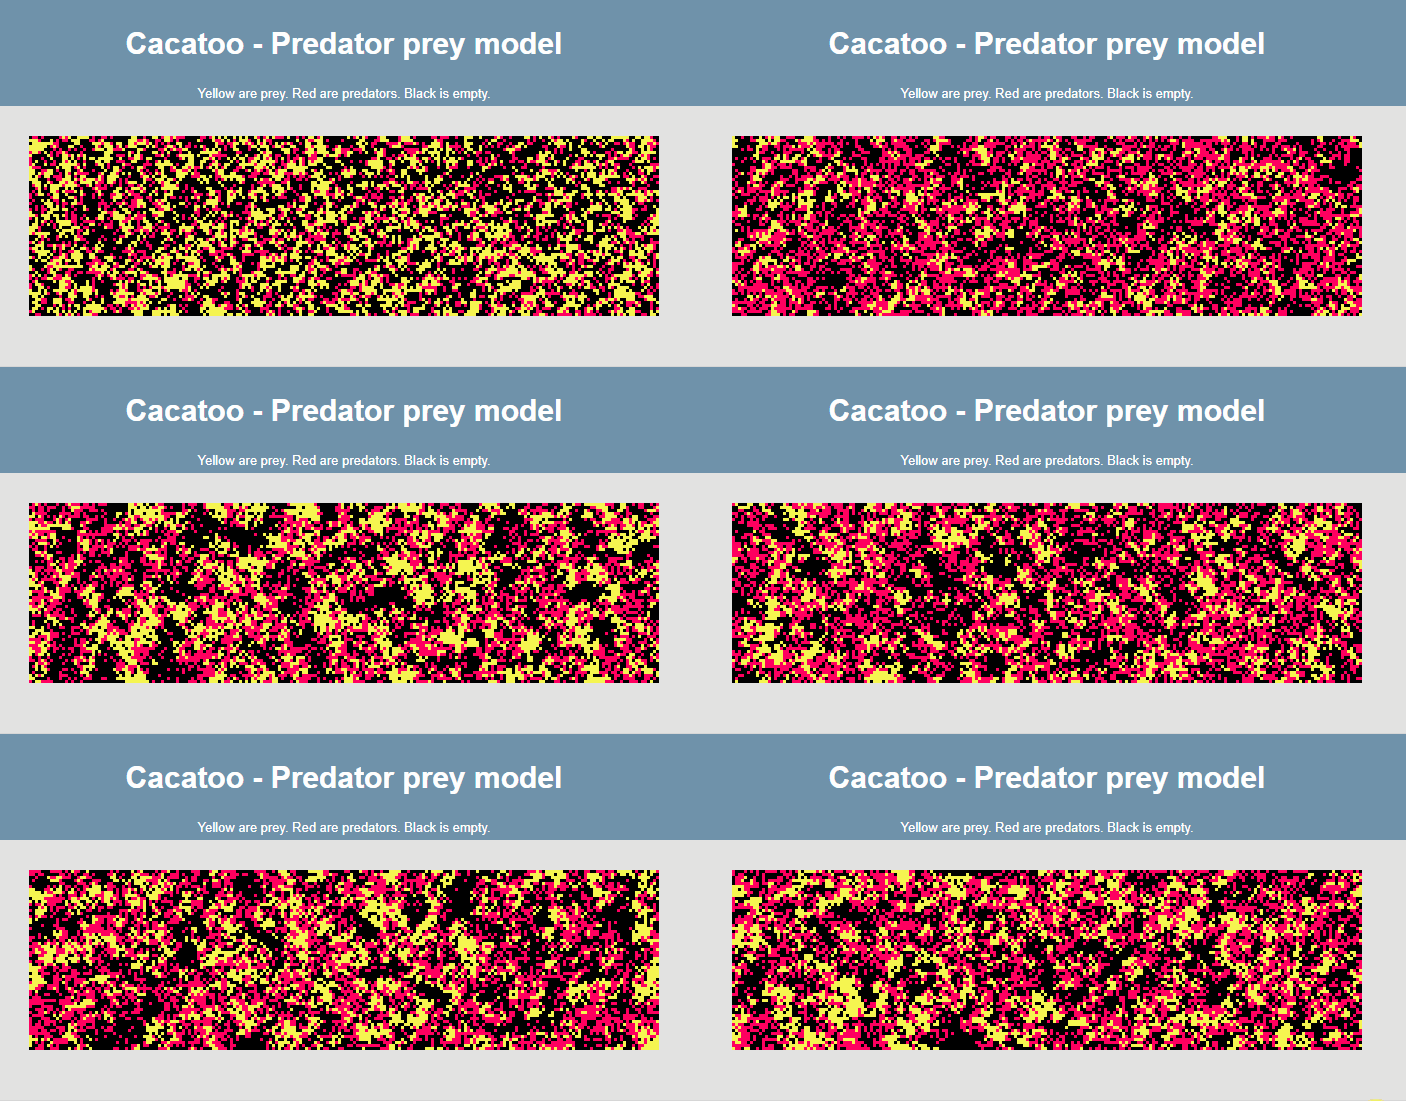
Now that you have a basic idea of the structure of a Cacatoo model, let us modify an existing example project into something new! You can either do this by modifying one of the examples on the Replit repository, or by cloning the Github repository and using your own favourite editor (I recommend Visual Studio Code, as I describe in this blog post). The goal is to make a simple predator-prey model like the one shown on my website. Although the version on my website (see animation below) was not made with Cacatoo, let's try and make it look like the animation below as much as we can!


Here are the steps we are going to take in this tutorial:
  1. A first look at the code
  2. Defining the next-state rule
  3. The main update loop
  4. (optional) Adding interactive elements


A first look at the code

Whether you are working on Replit or have your own copy of the code, you should be able to find a file called "empty_project.html". As a first step, simply make a copy of this empty project and take a look at the code. In Replit, you can also directly start editing "index.html", so you'll immediately see your progress every time you hit "Run". Try opening your newly copied HTML file in a browser (I recommend Google Chrome or Safari). You should see something like this:

Not very exciting, but that's because we haven't programmed anything yet! Let's take a look at the code. It starts with a bunch of basic HTML stuff:

    <html>
        <script src="../../dist/cacatoo.js"></script>            
        <script src="../../lib/all.js"></script>                 
        <link rel="stylesheet" href="../../style/cacatoo.css">   
        <head>
            <title>Cacatoo</title>
        </head>
        <script>    

The code above is not particularly interesting, but if you have problems with the libraries loading, this is probably the place to start digging. That reminds me, if you are not seeing anything happening, even though you expect something, try opening the developer console (CTRL/CMD+SHIFT+I in Chrome). It will tell you what went wrong.

In the next bit of code, a global variable "sim" is declared, and a new function is created called "cacatoo":
let sim; // Declare a variable named "sim" globally, so that we can access our cacatoo-simulation from wherever we need. 

function cacatoo()
{
 ... (rest of the code)
}
The function named "cacatoo" will contain everything Cacatoo needs to know to start simulating, and is later called as an onload option for the HTML page:

<body onload="cacatoo()">

Inside this main Cacatoo-function, the code is made up of three main blocks (corresponding to the three steps given in the introductionary tutorial):
  1. Setup
  2. Defining the rules
  3. Main simulations loop

I have also added numbered comments to the code of the example projects, hopefully helping you to find your way around. For now, let's go through them one by one.


Setup

First, let's modify the setup-code so that our model has a name, and a grid-size/colours corresponding to the predator-prey example we decided to recreate:
let config = 
{                                        
    title: "Predator prey model",                 // The name of your cacatoo-simulation
    description: "My first model",                // And a description if you wish
    maxtime: 1000000,                             // How many time steps the model continues to run            
    ncol : 210,                                   // Number of columns (width of your grid)
    nrow : 60,		                              // Number of rows (height of your grid)
    wrap : [true, true],                          // Wrapped boundary conditions? [COLS, ROWS]   
    scale : 5,				                      // Scale of the grid (nxn pixels per grid point)
    statecolours: { 'species': { 'prey': [245, 245, 50], 'predator': [255, 0, 96] } },          // Colours for each species. Empty grid points default to black. 
}
    
Next, let's initialise the simulation, make a new GridModel inside that simulation, and initialise the grid with a small fraction of predators and preys:
sim = new Simulation(config)                          // Initialise the Cacatoo simulation    
    sim.makeGridmodel("model")                              // Build a new Gridmodel within the simulation called "model" 
    sim.initialGrid(sim.model, 'species', 'prey', 0.2, 'predator', 0.2)                // Set half (20%) of the Gridmodel's grid points to 1 (prey), and 20% to 2 (predator)
    sim.createDisplay("model", "species", "")                      // Create a display so we can see our newly made gridmodel. The third argument (here left empty) is the label shown under the display.
  

If you now refresh your web page in the browser, the result should already start looking a lot more like our target:


But of course, not much is happening yet. The colours and the grid-size are good, but we still need to define the "nextState" function (step 2). If we don't, the individuals Just kind of sit there... So let's go to step 2!


Defining the rules

Let's define our nextState function, which will decide how every grid point gets updated. For now, this piece of the code looks like this:
sim.model.nextState = function(i,j)                   
{   
    // Empty
} 
Let's keep the model as simple as we can, and assume that: This would translate into the following "rules" for a grid point: To implement the above rules, I use two functions that are already present in Cacatoo: "randomMoore8" and "genrand_real1" (generate a pseudorandom number). The former is used to sample a random grid point from the "Moore" neighbourhood (8 adjacent grid points). This we can use to check if there are predators or prey around, and it also creates a density dependence as it will naturally have a higher chance to sample an individual when there are more individuals around! The second function simply generates a random number to put some stochasticity on the birth and death events. Here's the code I came up with:
sim.model.nextState = function (i, j) {
        let randomneigh = this.randomMoore8(this, i, j).species   // Random neighbour

        if (!this.grid[i][j].species)                        // If empty
        {
            if (randomneigh == 'prey' && this.rng.genrand_real1() < 0.5)
                this.grid[i][j].species = 'prey'                     // 1 (prey) reproduces
        }
        else if (this.grid[i][j].species == 'prey')                   // If prey
        {
            if (randomneigh == 'predator' && this.rng.genrand_real1() < 0.3)
                this.grid[i][j].species = 'predator'                     // 2 (pred) reproduces
        }

        if (this.rng.genrand_real1() < 0.05)
            this.grid[i][j].species = undefined                         // death
    }
When you have implemented the code bove, you should now see some action if you open the HTML page:


Main simulation loop


At this point you may wonder why the code already works, considering we haven't yet done step 3? Well, the main simulation loop in the default (empty) project actually already contains a synchronous update function:
sim.model.update = function()
{                                
    this.synchronous()        
}    


The synchronous function updates all grid points according to their nextState fucntion (which you defined above), making sure all of them are updated at the same time. Note that synchronous updating necessitates that one does not modify the neighbouring grid points in the nextState function, as this would mean a grid point that was already updated can be modified again by one of its neighbouring grid points. If you want to modify neighbouring grid points in the nextState function, always make sure to update the grid asynchronously (using this.asynchronous() instead of this.synchronous()), which updates all grid points in a random order.

Of course, there is more we can add to the main update loop, here's a few things you can try: For even more inspiration for what you can add to the main loop, see the various examples provided with the package.


(optional) Adding interactive elements

Maybe you want to be able to hit pause on your simulation, or hit a button enable mixing. Well, also that is easy with a few lines of code, which you can add before "sim.start()":
sim.addButton("Play/pause sim",function() {sim.toggle_play()})
sim.addButton("Disable/enable mix",function() {sim.toggle_mix()})
sim.addButton("Kill prey",function() {sim.my_custom_killprey_function()})
sim.my_custom_killprey_function = function()
{ 
    for (let i = 0; i < sim.model.nc; i++) for (let j = 0; j < sim.model.nr; j++) 
    {
        if(sim.model.grid[i][j].species == 1 && this.rng.genrand_real1() < 0.9) 
            sim.model.grid[i][j].species = 0
    }
}
sim.start()
And now, your model should run (see below). If your model does not work, open a developer-tools (CTRL/CMD+SHIFT+I in Google Chrome), and see if there are any errors in the tab "Console".


In the next tutorial, I'll show you how to model a simple bacterial colony, how to visualise continuous variables, and how to attach ODEs to your grid!

←Previous tutorial | ↑ Back to the top | Next tutorial →